Newbies Guide To Soda Dimensions 1-3

SO… Many people will start to wonder how to advance more efficiently. I’m sure if you have found this article you have at least reached Lvl 20-30 in the dungeon so I’ll start this going from there.

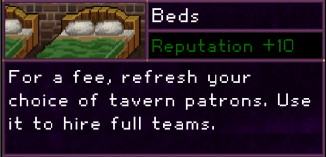
First, remember Beds in the Tavern. Get them! The bed not only allows you to hire more party members but will refresh the current “patrons” in the tavern, so if you bought a new soda, bam, you don’t have to wait a bit. Using this method fill up your party as much as possible because if you don’t you limit your power drastically, remember 2 soda junkies is not the same as two runs with only one. Here is a little table for you:


Number of junkies Total Health Total Attack Fighting Power
1 10 1 100%
2 20 2 250%
3 30 3 400%
4 40 4 550%
5 50 5 700%

Now you may say this doesn’t make sense how can it be 700% instead of 500%. Here is why, you need to take into consideration the amount of attacks before the enemy has the chance. Long in short more you have the better off you’ll be and that is how 700% is there, honestly I think that may be a little bit of a low ball.

Another key factor that increases your fighting power is items if you buy them or obtain them from drops doesn’t matter, point is that the more members you have in your party the stronger you’ll be and the longer you’ll last in the dungeon.


For the rest of this article I will describe a few guidelines to follow until you reach the fourth dimension. First don’t be afraid to spend your gold and essence upgrade as much as you can early on, to avoid issues in the future. Second make use of a common method called grinding, it may not be “fun” to deal with but get enough gear for all five party members. This will allow you to maximize your fighting potential before you reach the dimension bosses. Third make use of the wizards warp to severely drop the amount of useless item drops that will occur and advance further faster to challenge the boss. Lastly do not grind to long and if you have already beaten the boss then you should quickly move on to the next dimension as to increase your potential again.

I’ll end this on a single note and give my favorite grind team in the beginning. Everything is determined by fighting potential, and there are only two ways to get it; Item drops and, In game currency(gold/essence). The team I used the most was a Healer, Fighter, Conjurer, then one more of two of these so the result is 2:2:1. Each of them have benefits but considering how fast it is to get through the first few dimensions there isn’t much need for the higher tier tenants just quite yet.


Good luck, fellow Soda Warriors.

Team Spotlight #2

Looking for an amazing Warrior Dimension end-game team? Want to kill enemies easily and rack up all of that gold? Use this team:

Dark Mage
Dark Mage
Merchant
Wizard
Shifter (with Thief and Knight stones)

Granted that you have the Wizard and bought Void Cola, this team is truly amazing! Matching gear below not necessary.


Upsides:

  • The Dark Mages will take care of any mob (hoping you’ve upgraded your DM relic enough!)
  • The Merchant will increase gold earned by 20%.
  • The Wizard will allow you to warp 2x farther.
  • The Shifter (with Thief and Knight stones) will make sure you get all 3 chests compared to 1.
  • The Shifter (with Thief and Knight stones) will make sure that you will never get ambushed.
  • The Shifter (with Thief and Knight stones) will make sure you always choose the best door.

Important:

  • Make sure that your relics (especially Dark Mage or Potable Potion) are leveled as high as possible.
  • Make sure that your Shifter’s Thief and Knight stones are at the max level, or fairly close.

GroggyOtter’s Guide to Shifters

Screenshot of a Shifter.

“Learns the abilities of characters over time.”

Details
HP
40
ATK
30
MP
40
# Special Items
1
Hire Cost
100 (45) Gold
Tavern Reputation
1,000

They’re just like any other class except their last accessory slot lets you equip up to 2 skill sets from other Soda Dungeon characters.

Skills must be earned by having your shifter fight in a party with the class you’re wanting your shifters to “learn”. After X amount of battles, you’ll unlock the first ability for that class. Another X amount of battles later you unlock the second. And so on.

Once you have at least one ability unlocked, you can equip it on your shifter and benefit from that skill.

Shifters are primarily used in end game as a knight filler because knights only have 1 acc slots but are mandatory for avoiding surprise attacks (and for always selecting the correct bonus door). By sticking a knight and another class on a shifter, you’re freeing up a character slot that allows you to have 2 accessories. For example: If you’re hurting on dps, you can stick a thief and knight on a shifter and add another DM. Now you have more damage but you haven’t lost out on the bonuses from your thief or knight.

It’s generally advised not to use them for attacking as you most likely haven’t pumped their relic up. They’ll do substantially less damage than, let’s say, a DM with a pumped relic.

Class Max Stone Level # of Battles Skill Order
Lvl 2 Lvl 3 Lvl 4 Lvl 5
Soda Junkie 2 500 Twitchy
Ruffian 2 500 Dagger Toss
Conscript 2 1,500 Lethal Tactic
Fighter 3 1,500 1,500 Dropkick > Pile Driver
Conjurer 4 1,000 1,000 1,000 Magic Adept > Bolt Storm > Divination
Healer 4 1,500 1,500 1,500 Therapy > Group Heal > Refresh
Thief 5 1,500 1,500 1,500 1,500 Greedy > Pilfer > Sharp Eye > Crit Master
Knight 5 2,000 2,000 2,000 2,000 Heavenstrike > Noble > Leader > Smite
Merchant 4 2,000 2,000 2,000 Wealthy > 50/50 > Affluence
Darkmage 4 3,000 3,000 3,000 Magic Master > Noxin > Necroblast
Ragezerker 4 3,000 3,000 3,000 Unruly > Roar > Rage
Gladiator 4 3,000 3,000 3,000 Lorarius > Brash > Branding
Wizard 5 3,000 3,000 3,000 3,000 Eviscerate > Debilitate > Sage > Precognition
Shopkeeper 4 3,000 3,000 3,000 Hardy > Focus > Remnants
Owner 4 3,000 3,000 3,000 Torpor Tonic > Closing Time > Divine Ichor

This is a guide by GroggyOtter. Used with permission.

True Warriors Only!

Hello. Today I will talk about Tengen. Tengen is the level 700 boss in which you can only kill with the Fighter class. Here are some tips from me.

Tips:

  • Have the Relic of Fighter at level 10-100
  • Have Vigor Swig at level 10-50
  • Have Sip Of Vitality at level 50-100
  • Have Crespia (Shark Pet)

Additional Tips (Not needed but recommended)

  • Have All sight
  • Magic Clock
  • Kitchen at level 10

These are my tips for beating Tengen.

What classes I used:

  • Fighter
  • Fighter
  • Fighter
  • Fighter
  • Fighter


Soda Junkies aren’t always the weakest…

Hello, everyone. Today I will be showing you that Soda Junkies (Peasant Pop) aren’t always the weakest.

I will be using my YouTube save on dimension 3.

How I got them to be so strong:

1) Complete Dimension 1 and get the Relic of Soda Junkie.

(Description: Soda Junkie Only. Grants ‘Twitchy’ skill. Also gives: +2HP, ATK, and MP per relic level)

download (11)

2) Level the relic up to at least level 5.

Now your Soda Junkies are much better!

In the video, I go to level 40 – 59  with only Soda Junkies.

Hope it helped all of you get through level 20-60 without having to spend much or any gold!

Soda Dungeon 2 News!

Today on the official Soda Dungeon Discord, the Soda Dungeon developer, anpShawn answered a person’s​ (Pootis) question! Here’s what went on;

Pootis: I find it weird that a sequel would be put into this game, I’d expect them to just keep making updates to the original.

anpShawn: The current game has a lot of limitations. For example, it can’t be translated to other languages.

Pootis: Ah, okay. So it’s pretty much going to be a “remastered” version.

anpShawn: It will be a very similar experience, but it’s more than a remaster. We’re trying to take everything from the current game, do it better, and add more stuff.

Pootis: Ah, I’ll be looking forward to it!

I’m excited about Soda Dungeon 2! What are your guy’s thoughts on the next game?

How to defeat Demora (Lvl 500) and Tengen (Lvl 700) guide

Demora (Level 500)

Screenshot_19.png

So, if you were like me back in the day, you’ve probably struggled with Demora. Demora is actually pretty easy to defeat once you know how. Use the team below:

Healer
Healer
Healer
Healer
Knight

You’re probably thinking, “4 Healers? But why?” Well now, the answer to that is quite simple. You need Healers. Healers are the only way that you’ll be able to defeat her. The Knight is there to make sure you don’t get ambushed or choose a trap door from Lvl 490 – 500. What you want to do is warp to Lvl 490 and defeat all of the enemies until 500. There, Demora will appear. She’ll say:

“Have it your way, but I warn you. Only the touch of life can harm a soul as dark as mine.”

She’s giving you a big hint. Life! Even the Wizard said something similar about that previously when reaching D5.

So, here’s what you do. Use your Therapy skill on her and it’ll damage her. Keep doing that (while healing your Healers once in a while) and eventually you’ll defeat her. Easy! After defeating her, she’ll say:

“To the darkness I return.”

Tip: Kill only one of the skeletons and leave the other alive. Defend with all non-healers afterwards.

Tengen (Level 700)

Screenshot_20

Tengen. Now he’s a toughie, or at least seems like one. He’ll make all of your team flee… or does he? Use the team below:

Fighter
Fighter
Fighter
Fighter
Healer

So, 4 Fighters? You bet your caps 4 of them. Fighters are the only way that you’ll be able to defeat Tengen. The Healer is only so that your fighters make it through Lvl 690 – 700. What you want to do is warp to Lvl 690 and defeat all of the enemies until 700. There, Tengen will appear. He’ll say:

“Your group is powerful, there is no denying it. But I hope you know what is coming. Defeating us only opens the way for something far more powerful. But enough talk. Fighters, show yourselves!”

Again, another hint. Notice how he says, “Fighters, show yourselves,” specifically? This is proof that he wants to only battle against the Fighter class. This is why you need them.

The first turn, he’ll use the skill Fighting Spirit to make the people on your team who aren’t fighters flee (unless your team consists entirely of Fighters). Take advantage of this turn by dealing as much as damage as possible with the Piledrive skill. Very simple! After defeating him, he’ll say:

“It was an honor.”

That’s all there is to it! I hope you enjoyed this guide on how to defeat Demora and Tengen!

– kui

Kui’s Ultimate Soda Dungeon Gold Guide (Updated 3/15/17)

Still upgrading that tavern? Need some more of those sodas? Perhaps you’re still trying to trying to get the Magic Clock?

Anyway, enough with the questions. Of course you need gold, you silly thing! Below are some tips and tricks stacking up those gold coins… without any hacks, of course!

Gold Gear

The first technique is well-known and simple one. Gold gear! Have you ever gotten an item such as a Gold Shield, Vaan’s Magnet, or the Midas Plate? Well, these items give an increase in gold! That’s extra gold per run! Here is a list on where to find each gold-giving item and where to find them:

Gold Shield
Lvl 1 – 71-80
Lvl 2 – 171-380
Lvl 3 – 271-480
Lvl 4 – 371-580
Lvl 5 – 471-680
Lvl 6 – 571-780
Lvl 7 – 671-880
Lvl 8 – 771-980
Lvl 9 – 871-1080
Lvl 10 – 971-1180

Vaan’s Magnet
200-300

Midas Plate
Lvl 1 – 400-500
Lvl 2 – 900-2000
Lvl 3 – 1400-2500
Lvl 4 – 1900-3000
Lvl 5 -2400-3500
Lvl 6 – 2900-4000
Lvl 7 – 3400-4500
Lvl 8 – 3900-5000
Lvl 9 – 4400-5500
Lvl 10 – 4900-6000

Royal Shield
Lvl 1 – 700-800
Lvl 2 – 1200-2300
Lvl 3 – 1700-2800
Lvl 4 – 2200-3300
Lvl 5 – 2700-3800
Lvl 6 – 3200-4300
Lvl 7 – 3700-4800
Lvl 8 – 4200-5300
Lvl 9 – 4700-5800
Lvl 10 – 5200-6300

Other gold-increasing items will be added soon.

Thieves and Merchants

Out of the many classes Soda Dungeon has to offer, there two that help get you a lot of gold: Thieves and Merchants.

Thieves

Thief1.png

So, you’re probably wondering, “Thieves? How? They just steal… stuff.” And that’s what I thought before, too! But then I realized the great pros of having 1 or 2 in your team!

Upsides:

– Can Pilfer items or gold (depending on the enemy)
– Opens all of the chests (all 3 of them!)
– Increases chance of better items by 20%

Merchants

So what do Merchants do? Well, they give you gold, of course! Merchants are also exceptionally good at clearing out bosses.

Upsides:

– Active skill gives 50% chance to remove 1/2 of target’s HP, perfect for clearing tough bosses!
– Increases gold earned by 20%

Additional gold-increasing tips

The Banker

First, the banker won’t activate until you’ve been away from the game for at least ten minutes.

If you’ve been away for at least ten minutes the banker will earn an amount of gold that is based on both your time spent away from the game, and the level of the banker itself. This could be anywhere from 10-30% of your current gold supply.

When this happen the banker sets aside that amount of money to put in his safe. He will keep earning gold if you keep entering/exiting without collecting.

However, the banker can never store an amount of gold that is greater than half of your current savings, no matter what.

The banker can also not hold more than 1 million gold.

– Afro Ninja

Liquid Gold

Upgrade this relic as high as you can. You won’t regret it after seeing all of the gold you’ll earn!

Description: +1% gold earned per relic level for each party member


Note: More sections will be added to this guide in the future, so stay tuned!

Are you able to help with this guide? Is there some info you’d like to share? Please leave a comment below some advice if you are able to help! I’d really appreciate it! 🙂

Works cited:

http://sodadungeon.gamepedia.com/Compendium
http://sodadungeon.gamepedia.com/Thief
http://sodadungeon.gamepedia.com/Merchant

Team Spotlight #1

Looking for a good early team for D2 – D5? Do you want to gain all the loot and not get ambushed by mobs? Use this team:

Healer
Thief
T
hief
Thief
Knight

It’s an amazing early team with several pros! Gear is preferable.

Screenshot:

Upsides:

  • The Thieves (though one is all you need) make sure you get all 3 chests compared to 1!
  • The Thieves are the best damage dealers for mid game due to their crit passive.
  • The Knight will make sure that you will never get ambushed.
  • The Knight will make sure you always choose the best door.

Important:

  • Have the Healer in front always so he always gets a chance to heal.